Interactive effects in your Figma prototype can really bring your work to life. In this tutorial, we'll walk through an example step-by-step on how to create such a prototype to bring the magic to your presentations using a button component and one of its variant.
1. Set up the file
Let's begin by opening a new file in Figma. Then insert a new frame. We'll be using the one for the iPhone 16 Pro Max. Now let's prepare the layout guides. Make sure the frame is selected, tap the plus next to layout guides. We'll use a grid of 8 pixels. Then add 5 columns.
2. Create the Button
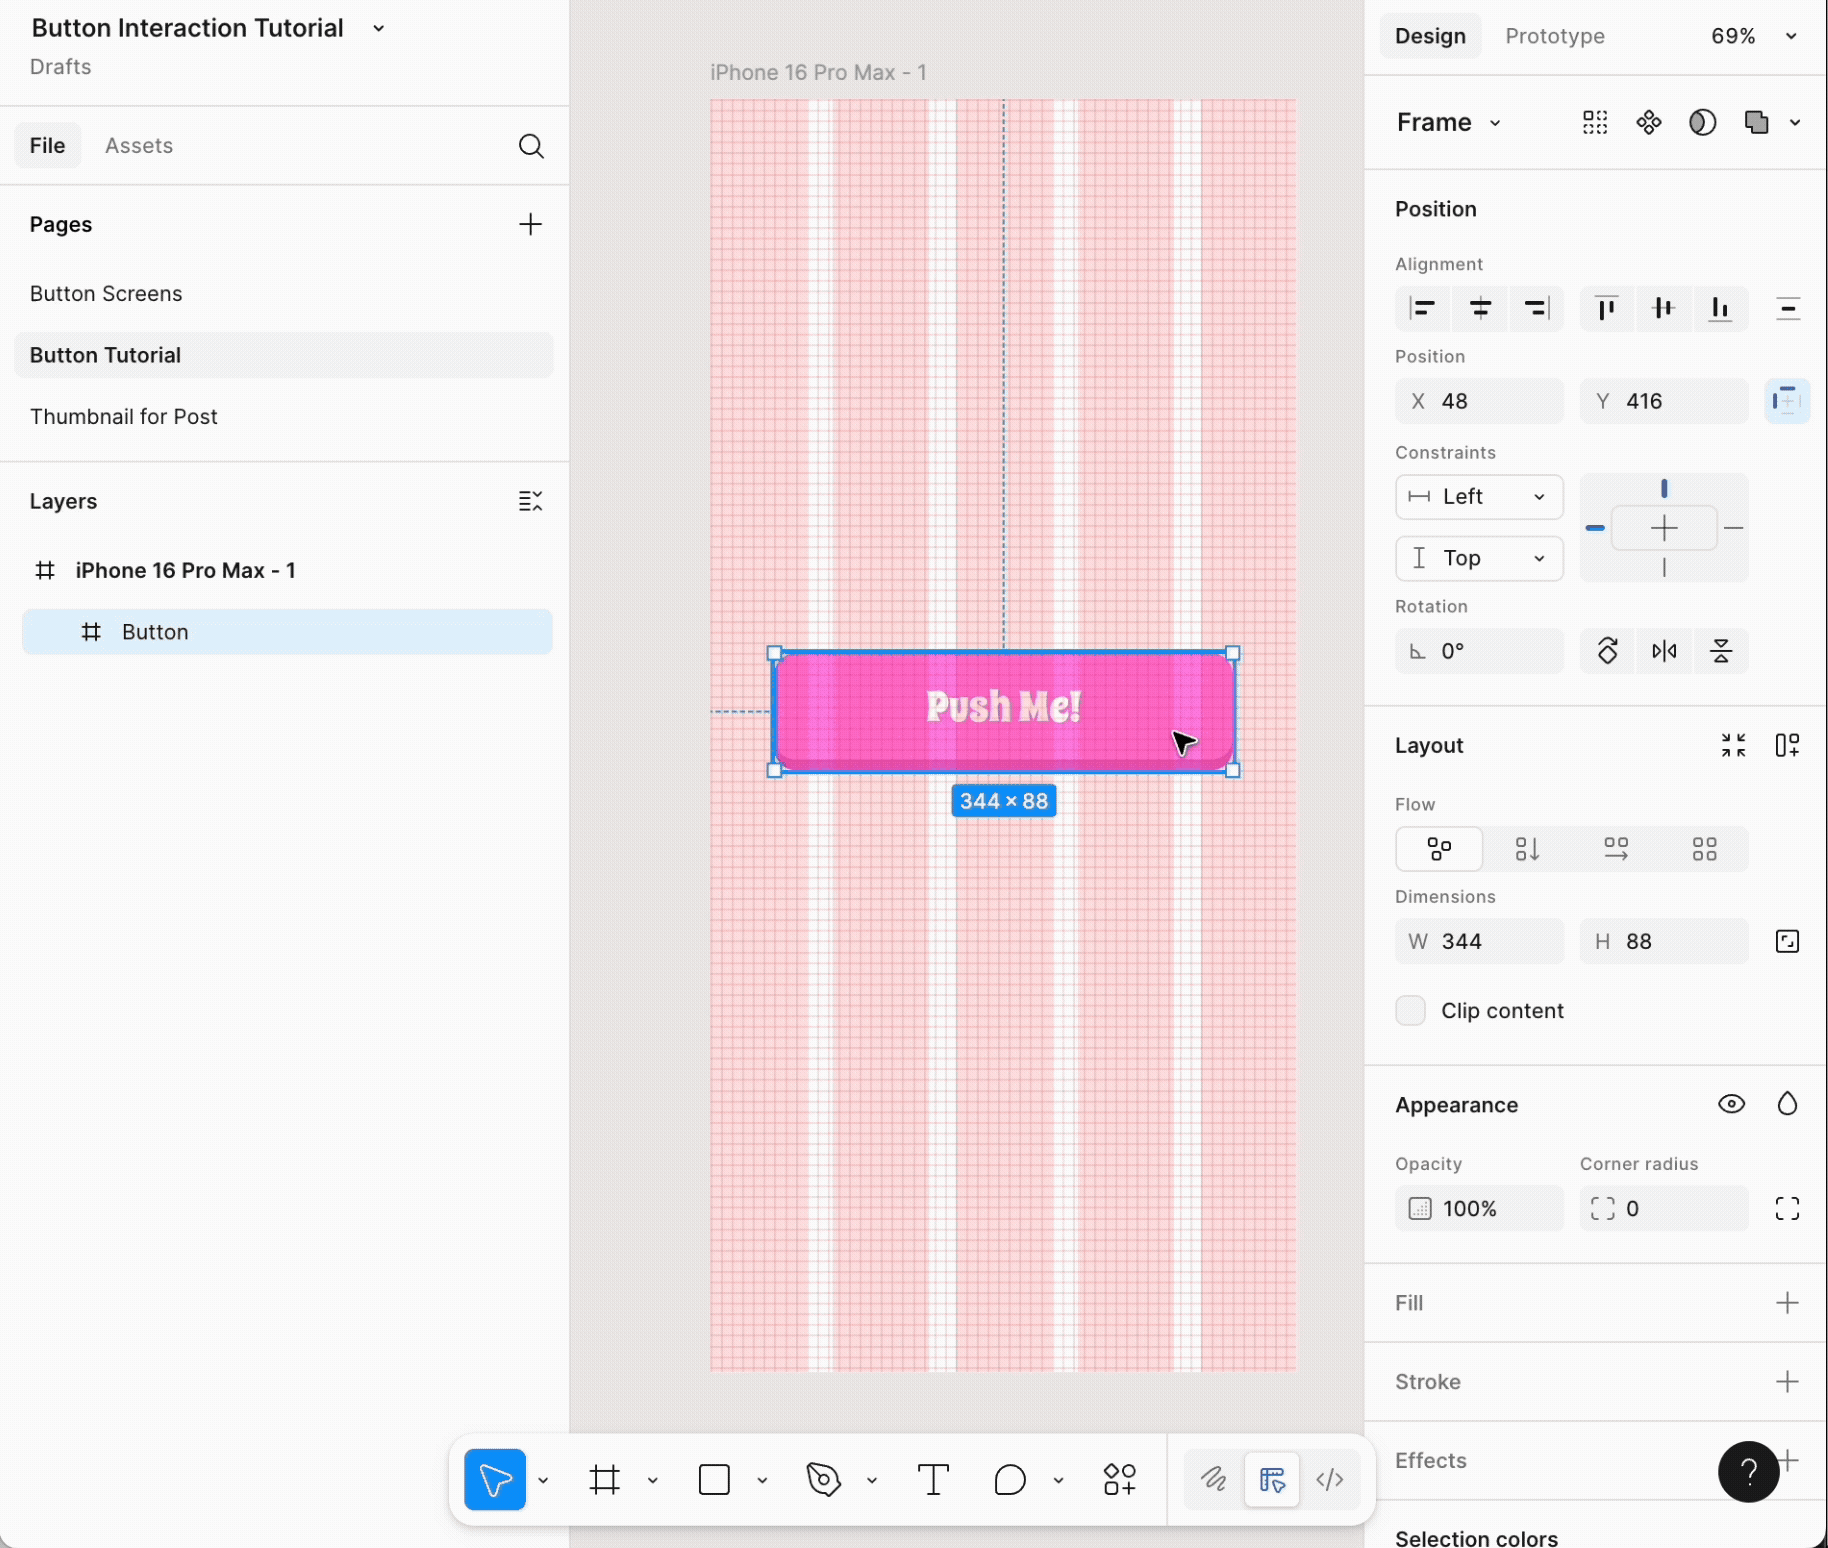
Now, let's click the rectangle shape tool in the toolbar so we can draw the button. Give it the dimensions 344 x 80 pixels. Next, set the corner radius to 16 pixels. Change the fill color to #FF85E7.
For the shadow, make a copy of the button and push it down by 8 pixels. Change the color to #E763CD. Then, right click on this shape and send it to the back.
We'll add some text to the button now. Click the text tool in the toolbar. Write the text "Push Me" or anything you like. The font is Spicy Rice and the fill color is #ffffff. Click the text and the button top, then center the text in the button with the alignment tools.
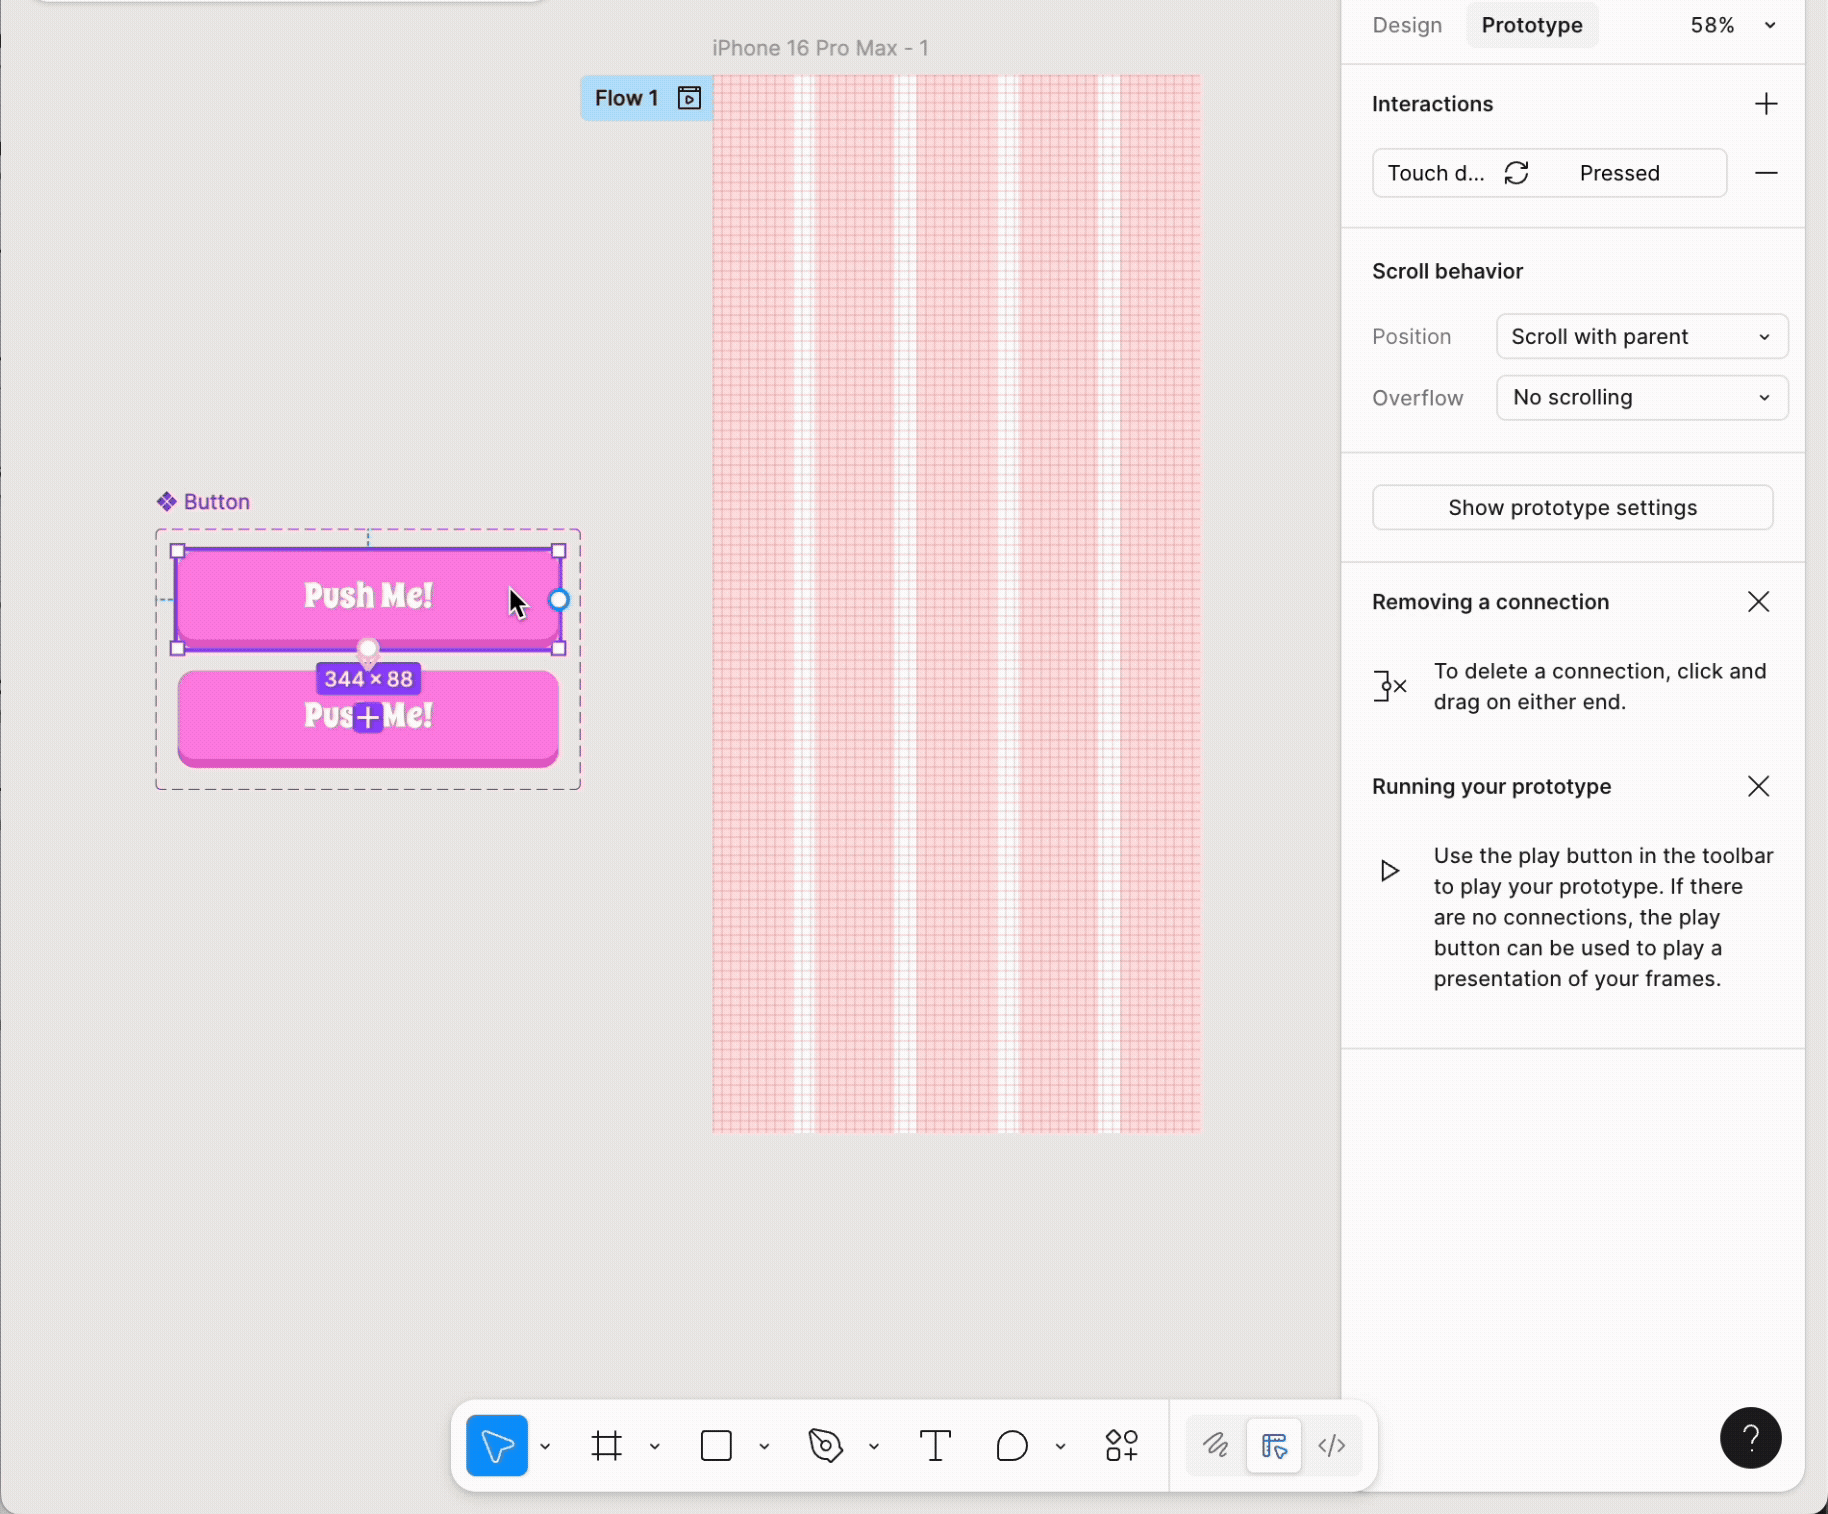
Select all 3 elements, group them using Cmd + G (Mac) or Ctrl + G (windows) and rename the group "Button".

3. Create a Component and its Variant to Prototype
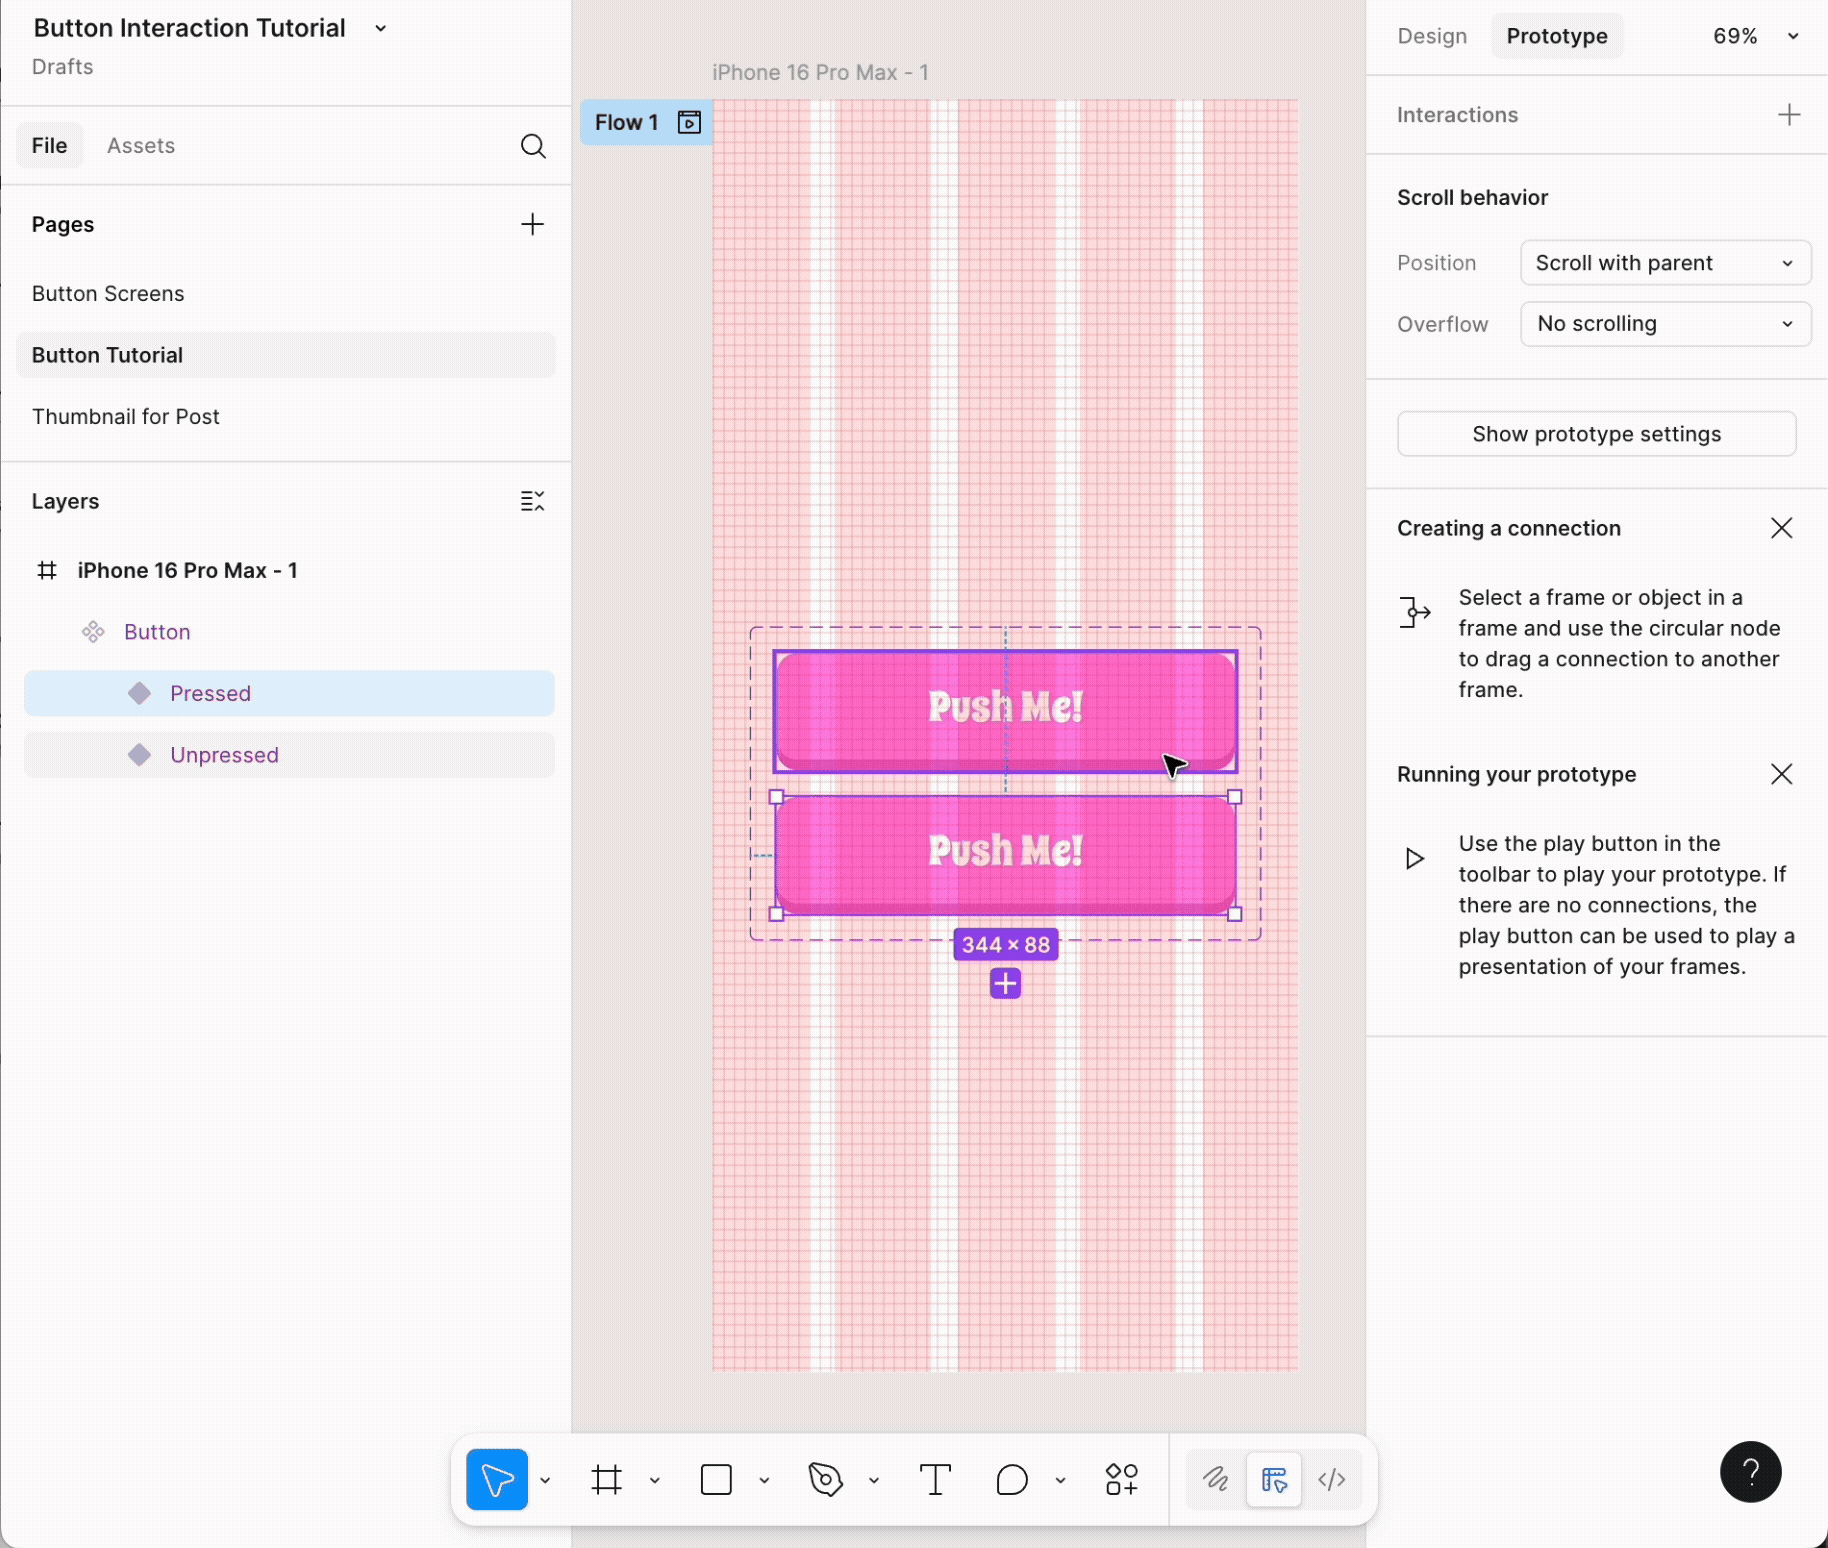
Let's make the pushed variant of the button. Click the button group and turn it into a component by clicking on the Create Component Button. Now click Add Variant so we get a variant of our button. Select the top of the button and the text then push both of them down over the shadow to simulate a pressed button. Rename the first variant Unpressed and the second one Pressed.
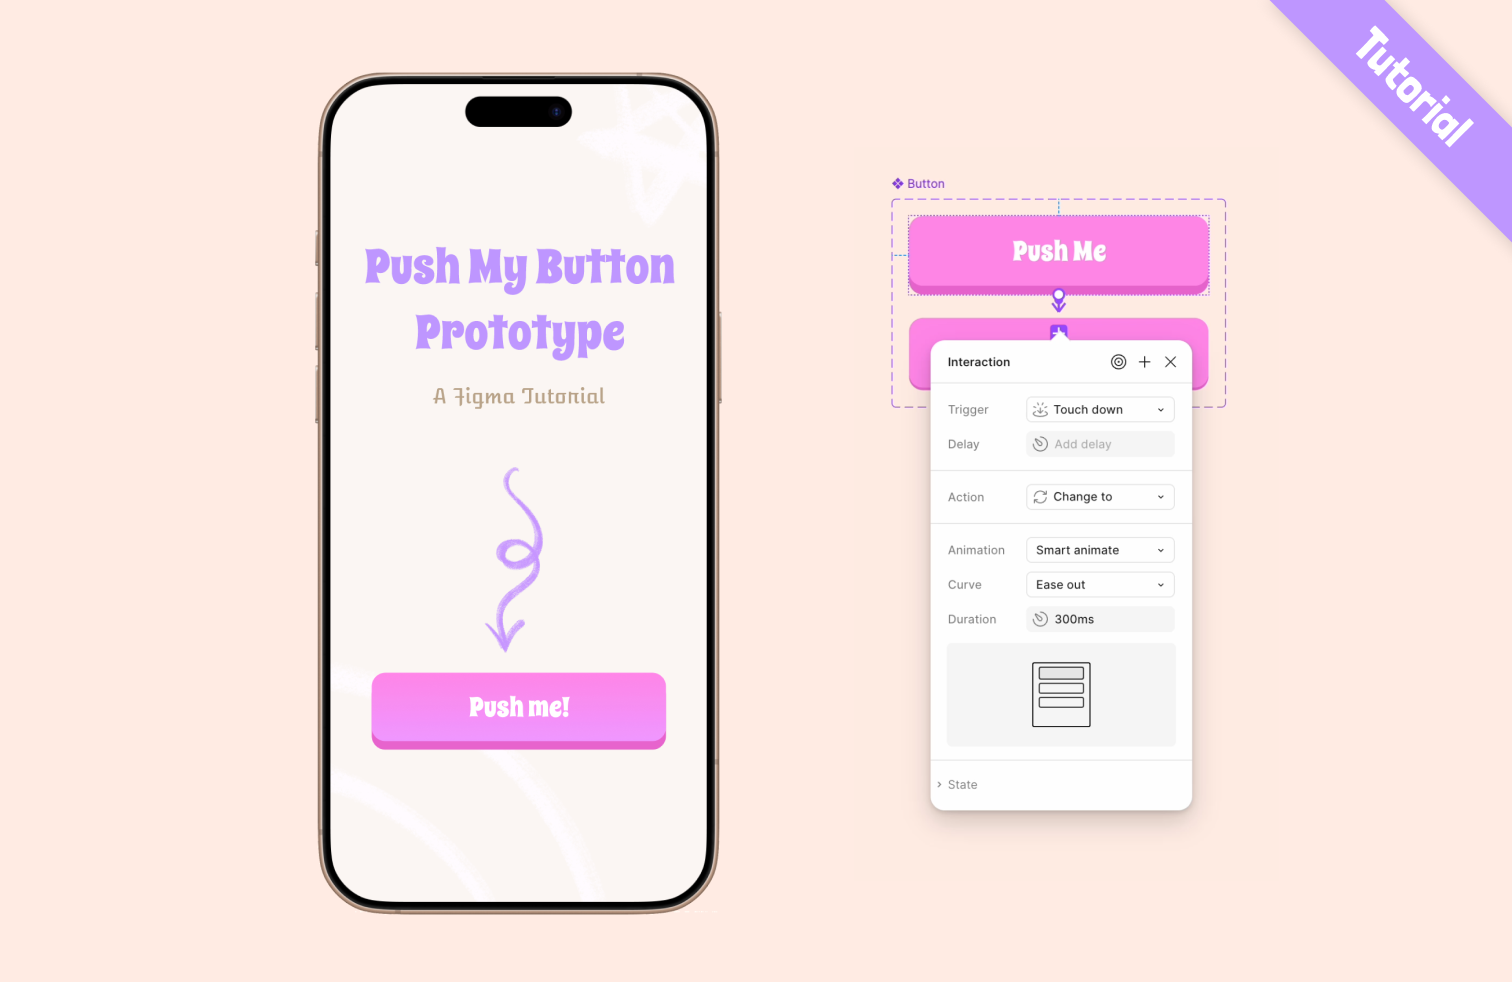
4. Prototype the button press animation
Now we've reached the fun part! Prototyping. Go to the prototype tab. Click the Unpressed button variant. Create a noodle from the first variant to the second one by clicking the blue plus icon and draging it to the pressed button variant. Change the trigger to touch down. Change the animation to smart animate so we can see the gradual movement of the button downwards when we click on it.
5. Add the Button to the Prototype Frames
Drag the component out of the frame. Put an instance of the button in the original frame. Press option and drag it onto the screen. Make another screen and change the background color so we can see the screens change more easily. Go to the prototype tab. Drag a noodle from the button to the new screen. Set the trigger to Touch up.
Go to the prototype tab and press play. Click on the button to see it work.
Conclusion
That's the end of our tutorial. I hope you enjoyed it. For a further challenge try making a variant for the button in the disabled state. See you soon and happy designing 😊.